Setting up a Windows 10 VM with QEmu on Ubuntu 22.04
I’ve been faithfully running VirtualBox for my Windows 10 VMs for years… until last week. A kernel update on Pop!_OS somehow broke my Windows 10 VMs across both my machines, causing frequent crashes until the disk images finally corrupted and wouldn’t boot anymore. I took this as a sign that it’s time to finally switch over to QEmu as my go-to VM platform.
Overview
While QEmu is advertised as running faster, it isn’t quite as user friendly as VirtualBox. There are a few extra pre- and post- setup steps we need to do and a few options on how exactly you run the machine. Here’s what I’m doing in a nutshell:
- Use
virt-managerto create the disk image and install Windows 10. - Install
virtioandspice-guest-toolsdrivers to increase performance and give quality of life features like shared clipboards and automatic resolution scaling. - Make a simple shell script that I can launch from a desktop file so I can access the VM directly without opening up
virt-manager.
First, lets install everything we need on our host machine. Basically, we just need qemu, which will be our VM emulator, and virt-manager which will help us streamline the setup and management of our new VM.
sudo apt install qemu virt-manager virtiofsd
We’ll also need an ISO holding missing drivers for our VM. Grab the virtio-win.iso from here.
Installing Windows 10
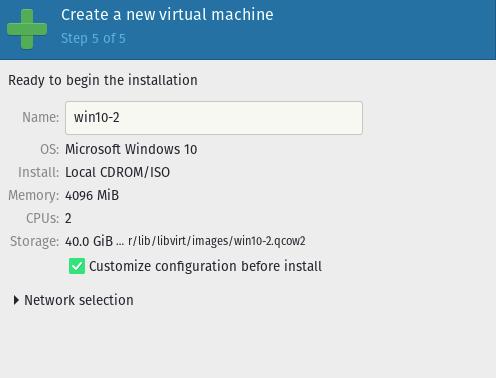
Launch virt-manager and go ahead and create a new virtual machine. virt-manager should pop up in your applications list as Virtual Machine Manager.
For the RAM and CPU options, I usually select half that of my host machine as I’m always worried about latent windows updates and background processes hogging all my system resources. For storage, the default option will create the new image in your default VM directory. Since I keep my VMs on a separate disk, I use create custom storage to specify where exactly this image gets created.
On the last step, make sure to select customize configuration before install. We’ll change our disk and network interface drivers to the virtio alternatives.
When the configure screen pops up, here are the changes you should make:
-
Disk 1
- Disk bus:
VirtIO
- Disk bus:
-
NIC
- Device model:
virtio
- Device model:
-
Add Hardware
- Device Type:
CDROM device - Select custom storage:
./virtio-win-0.1.217.iso
- Device Type:
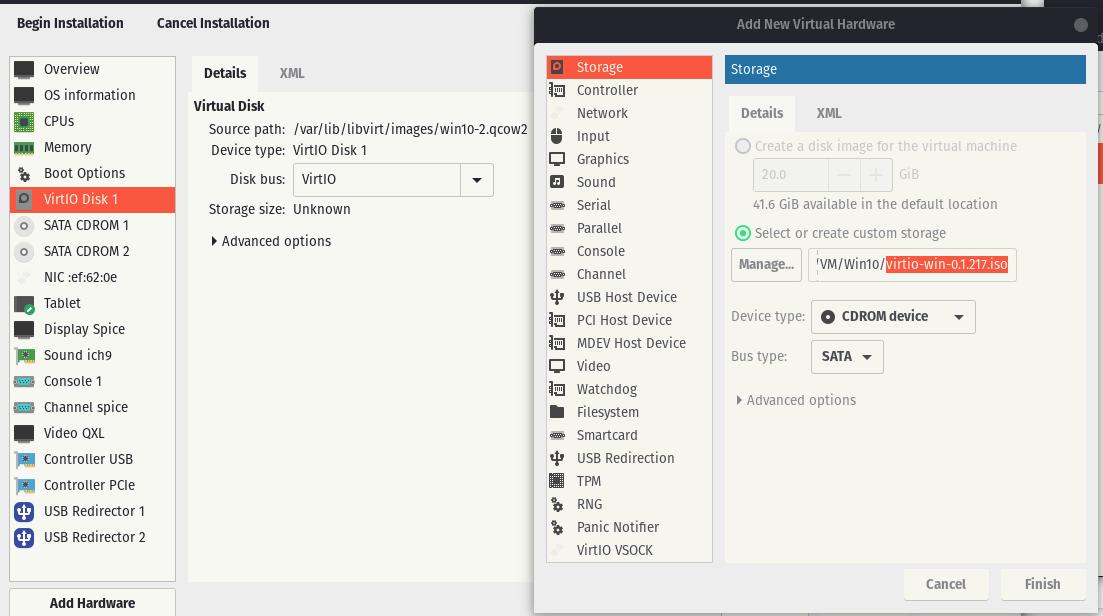
During the install process windows won’t be able to see our newly created disk image unless we load the virtio drivers during the install process. Including ./virtio-win-0.1.217.iso as a virtual CD will let you do this. Now go ahead and begin the installation.
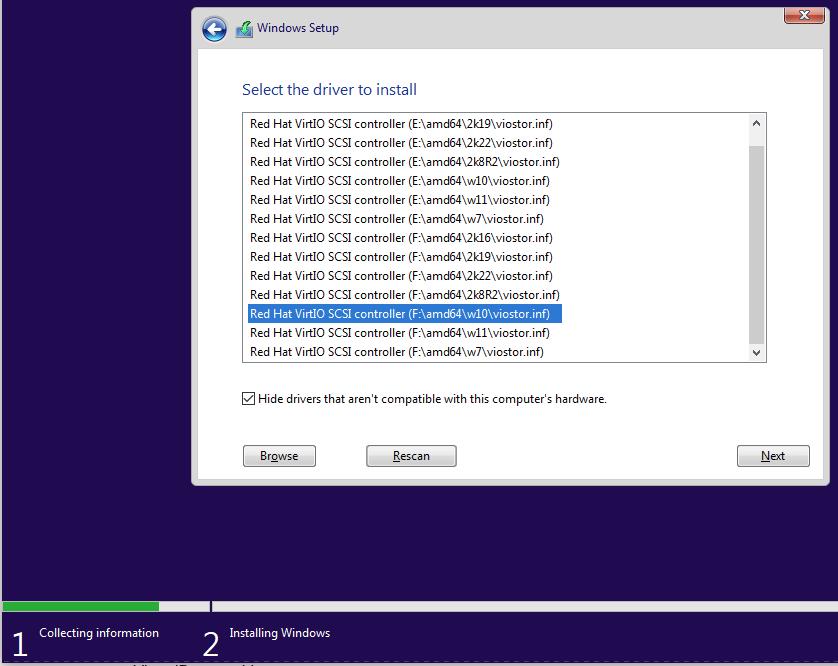
During the windows install process, select custom install. Select load driver and go ahead and select the E:\amd\w10\viostor.inf controller from the virtio CD we added in the previous step. Now you should be able to select the new disk image as the windows install location.
Thats about it. Just finish going about the windows installation as you normally would.
Post-install Tweaks
Out-the-box, virt-manager has given us a functional — but somewhat user-unfriendly — windows 10 VM. Let’s go through some quality of life tweaks to shape this into something that resembles what VirtualBox provides.
First, you’ll notice the mouse cursor is very laggy. We need to manually update our display adapter to use the virtio drivers here. Go ahead and do this through the device manager. You’ll have to select Browse my computer for drivers when you select update, then use the same virtio CD image we used during the install process to locate the new drivers.
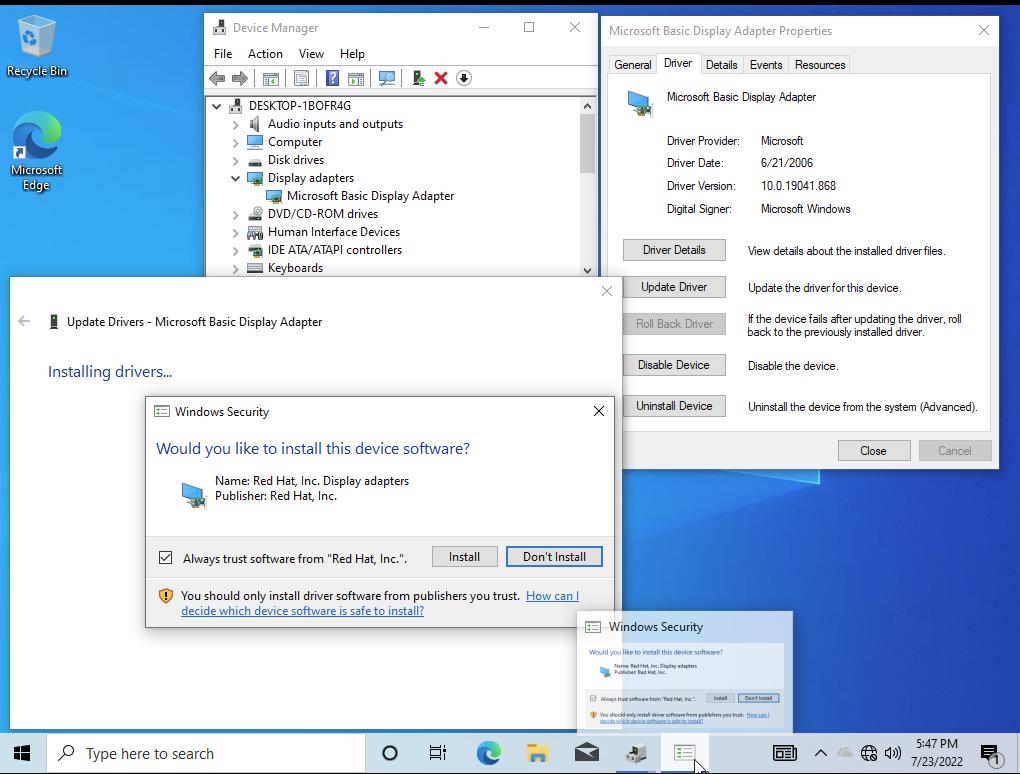
Go ahead and repeat this driver update for the Ethernet Adapter so we can activate Internet bridging.
Okay, now our VM is running smooth and the internet is up, lets install spice-guest-tools . This should give us:
- Clipboard sharing between the host and guest.
- Automatic resolution scaling when we change the VM window size.
- USB device passthough
On the VM, visit www.spice-space.org/download.html and grab spice-guest-tools. Its found under Guest > Windows binaries > Windows guest tools. Go ahead and run the installer once it’s downloaded. Immediately, clipboard sharing and resolution scaling should begin working. For resolution scaling, make sure View > Scale Display > Auto resize VM with new window is selected in the VM window. You can also select USB devices to passthrough in Virtual Machine > Redirect USB device .
Folder Sharing
SAMBA share. This requires virtiofds which we installed earlier.
Add hardware > Filesystem
- Driver:
virtiofs - Source/Target path: Source path is the absolute path to the host directory you want to share, and target path is the name of the network folder that will appear in your Windows 10 guest.
Custom Launcher with virt-viewer
Okay, our VM is running well. Personally, I want to be able to launch it without having to touch virt-manager or cockpit. The solution is to write a short bash script which we can call from a desktop file.
The script I wrote for launching my VM, named win10, is the following:
#!/bin/bash

# Add current user to libvirt group.
# This removes sudo requirement for following command
# sudo usermod -a -G libvirt $USER

virsh --connect qemu:///system start win10 &&
  virt-viewer --connect qemu:///system win10
I save this as run.sh and I keep it in the same folder as my VM disk image.
Note, for this script to run without sudo privileges you’ll have to run the following command once: sudo usermod -a -G libvirt $USER.
This will add your user to the libvirt permissions group.
Finally, in /home/$USER/.local/share/applications/ I save the following desktop file named Windows 10.desktop.
[Desktop Entry]
Type=Application
Exec=/mnt/storage/VM/Win10/run.sh
Terminal=false
Hidden=false
Name=Windows 10
Icon=qemu
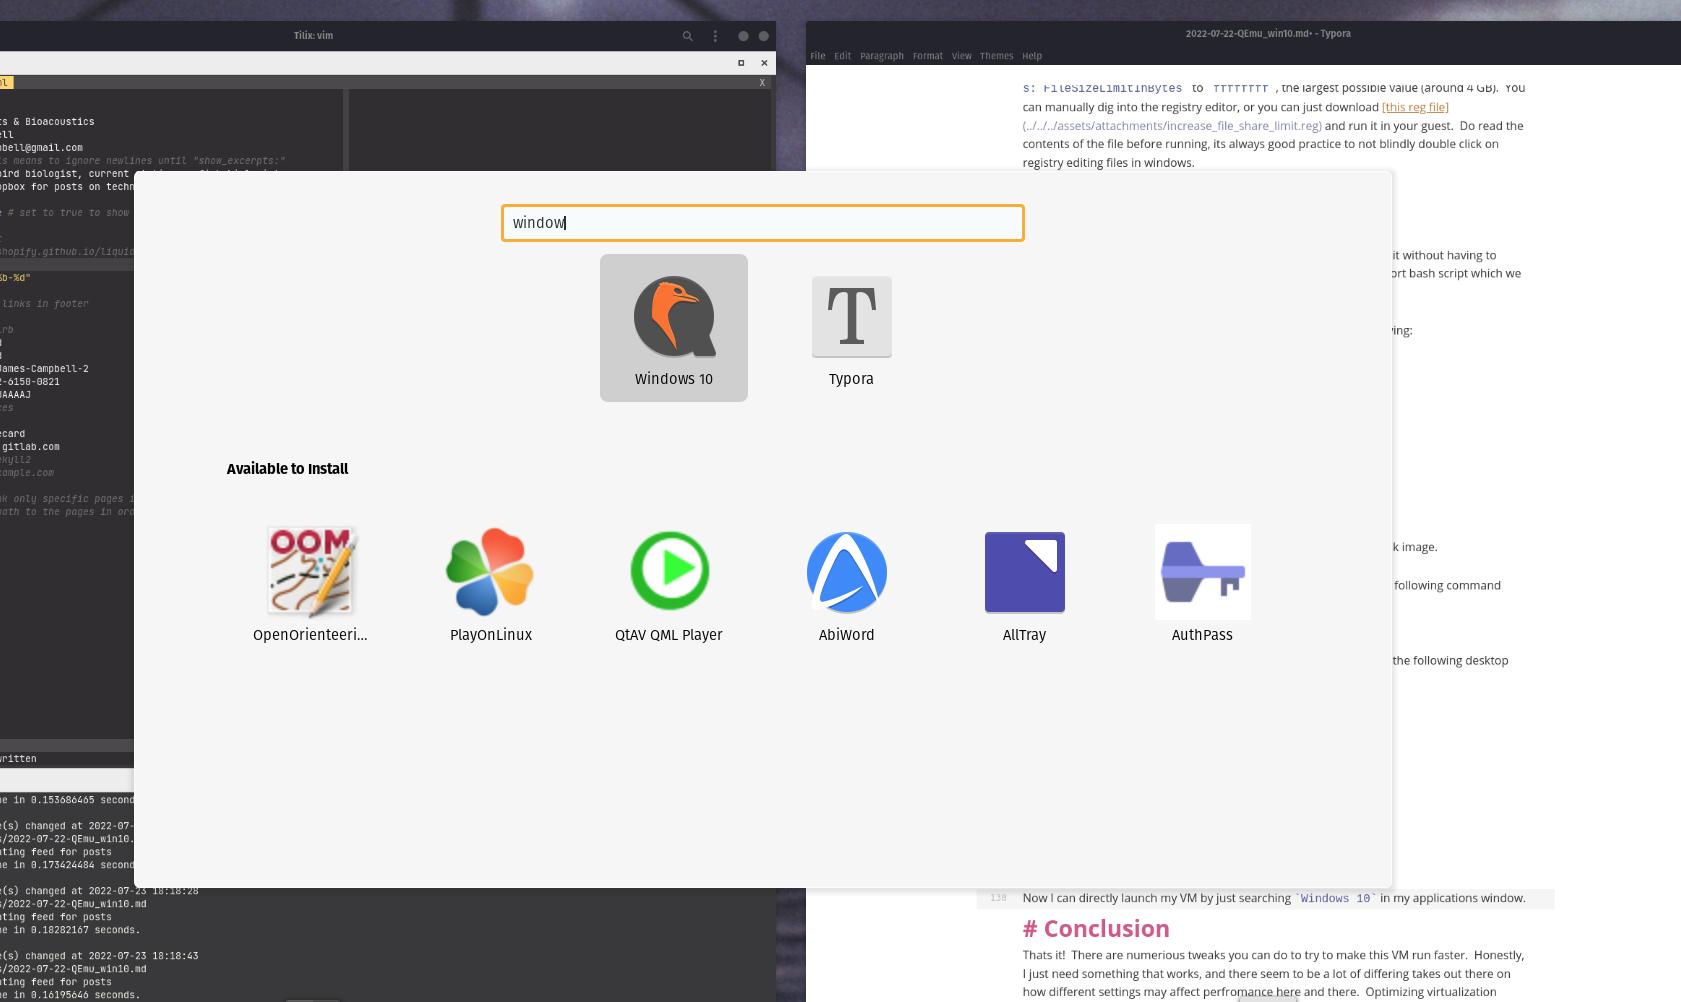
Now I can directly launch my VM by just searching Windows 10 in my applications window.
Parting Notes
Okay, I discovered some strange behavior. When I run the VM with virt-viewer (launching from my custom desktop file) there is an ever so slight input delay on my keyboard. This delay isn’t present when using virt-manager. However, virt-manager doesn’t have support for folder sharing. My current workflow is to only open virt-viewer when I need to upload some files into my VM, then use virt-manager the rest of the time. This isn’t ideal, but it’s honestly a pretty minor inconvenience.
Looking around, I couldn’t find anyone else complaining about keyboard lag in virt-viewer, so this may honestly just be a me problem.
Aside from that, that’s it! There are numerous tweaks you can do to try to make this VM run faster. Honestly, I just need something that works and there seem to be a lot of differing takes out there on how different settings may affect performance here and there. Optimizing virtualization is a pretty deep rabbit hole that I plan to stay well away from.